Create ReactJS Project
Create new folder named LearnReactJSWithRealApps and select to this folder in Visual Studio Code
Open Terminal windows in Visual Studio Code and use commands below:
npm install create-react-app@latest
npx create-react-app myapp
Create New Component
Open App.js file in src folder and create new component as below:
import React, { useState } from 'react';

function App() {

  let [product, setProduct] = useState({
    id: 'p01',
    name: 'name 1',
    price: 5,
    quantity: 6,
    status: true,
    photo: 'thumb1.gif'
  });

  const changeValue = () => {
    product.name = 'abc';
    product.status = false;
    product.price = 8;
    product.photo = 'thumb2.gif';
    setProduct({...product, product});
  }

  return (
    <div>
      <h3>Product Info</h3>
      id: {product.id}
      <br />
      name: {product.name}
      <br />
      price: {product.price}
      <br />
      quantity: {product.quantity}
      <br />
      total: {product.price * product.quantity}
      <br />
      status: {product.status ? 'Show' : 'Hide'}
      <br />
      <img src={'./images/' + product.photo} width="120" />
      <br />
      <input type="button" value="Change Value" onClick={changeValue} />
    </div>
  );
};

export default App;
Add Component to Entry File
Open index.js file in src folder and add new component to this file as below:
import React from 'react';
import ReactDOM from 'react-dom';
import './index.css';
import App from './App';
import * as serviceWorker from './serviceWorker';

ReactDOM.render(<App />, document.getElementById('root'));

serviceWorker.unregister();
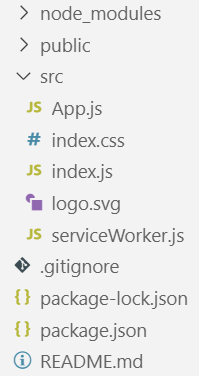
Structure of Project

Run Application
In Terminal windows in Visual Studio Code and type: npm start,
program will open url http://localhost:3000 on browser
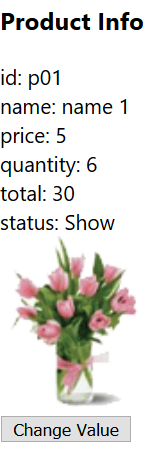
Output

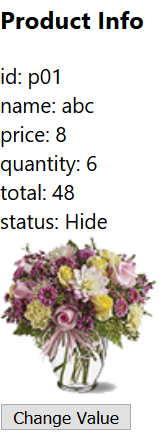
Click Change State Values button to change values in state


